Programming Environment: Mac OS X
We will be using the Anaconda distribution of Python (2.7). This section will guide you on installing Anaconda, PsychoPy, pyo, and Sublime Text. Although Python is installed by default in OSX we will not be using this default install. Instead we will be using the Anaconda environment which is bundled with lots of packages for scientific computing, allows you to more easily install packages and create virtual environments, and comes with a handy IDE (Integrated Development Environment) called Spyder.
Installing the Anaconda Distribution of Python
First let's check to see what Python is installed on your system. Open a terminal and type the word python at the prompt and press enter. To open a terminal enter 'terminal' in Spotlight (Command-Space). Tip: if you don't already have terminal pinned to your task-bar, now is a good time to do it.
When you enter python, You'll see output that looks something like this:
$ python
Python 2.7.10 (default, Feb  7 2017, 00:08:15)
[GCC 4.2.1 Compatible Apple LLVM 8.0.0 (clang-800.0.34)] on darwin
Type "help", "copyright", "credits" or "license" for more information.
>>>
From this output, we can see that Python is installed, and the currently installed version is Python 2.7.10. Let's exit out of it by entering exit() and enter and install the Anaconda environment. To keep things lean we'll install the minimal install of Anaconda called Miniconda and then add the necessary packages to it.
- First, download and Install the Python 2.7 64 bit Miniconda installer. If you are asked whether you want the installer to prepend Anaconda to the to the PATH, respond yes.
For simplicity, we'll install all the Python packages we'll need into the root environment of Anaconda. If you want a separate environment for PsychoPy, see Creating a virtual environment. If you don't know what virtual environments are and want to learn, see here
Installing the packages
- Once Miniconda is installed, go to
terminaland paste in the following commands, pressenterand wait for everything to install:
conda install spyder jupyter
pip install numpy scipy matplotlib pandas pyopengl pyglet==1.2.4 pillow moviepy lxml
pip install openpyxl configobj wxpython future json_tricks pyobjc
conda install pyaudio psutil
pip install psychopy
Test Anaconda Python Install
====
- In the terminal, enter
python, now instead of the Mac-bundled Python, you should see something like:$ python Python 2.7.13 |Anaconda custom (x86_64)| (default, Dec 20 2016, 23:05:08) [GCC 4.2.1 Compatible Apple LLVM 6.0 (clang-600.0.57)] on darwin Type "help", "copyright", "credits" or "license" for more information. >>>
Test PsychoPy
====
- Now let's test that
PsychoPyinstalled correctly. At the python prompt type:
>>> import psychopy
>>> psychopy.__version__
'1.85.3'
If you see this, you know that the PsychoPy library installed correctly.
- Let's test that PsychoPy can successfully open a new window
>>>from psychopy import visual
>>>visual.Window((400,400),color="green")
When you hit enter after the second line, you should see a small green window.
Test spyder
====
- Now let's test the spyder graphical IDE. From the terminal type
spyder. You should see something like this: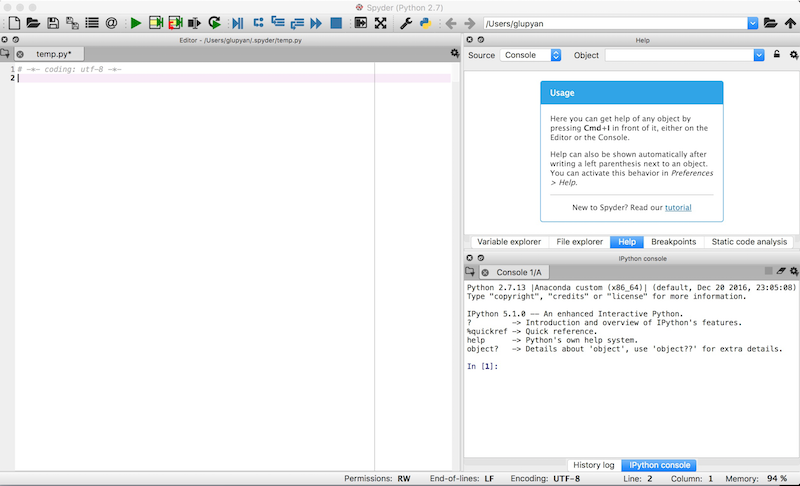
If that looks a like RStudio, that's because all these IDEs are descended from a common ancestor.
Installing pyo
- The last thing we need to do is install the
pyopackage whichPsychoPyuses to play audio files with low(er) latencies. Unfortunately this is a bit complicated. (There are easier-to-install alternatives, but in my testing,pyoconsistently produces more robust performance).
Download the .dmg file from here. After double-clicking on the downloaded .dmg file, the packager will open. Depending on your Mac settings, you may not be able to open the pyo_0.8.0_OSX_... icon by double-clicking on it. If you get an error about the program being from an unidientified installer, right-click on the pyo_0.8.0_OSX_... icon and choose open. Now, go through the installer hitting next until everything is installed. Note, the current version of pyo is 0.8.8, but 0.8.0 appears to be more stable so the link is for that version.
...Unfortunately, the installer installs pyo in the wrong place (it creates folders at "/Library/Frameworks/Python.framework" even if no Framework build of python is installed) and therefore it doesn't work out of the box for a version of python installed with Anaconda (or other Python distributions).
You can still use the .dmg installer, but you have to manually move the pyo files from the Framework to the Anaconda directory. Specifically you have to move the following files:
_pyo.so
_pyo64.so
pyo.py
pyo64.py
pyolib (folder)
These files need to be moved from inside /Library/Frameworks/Python.framework/ (for me, they're inside /Library/Frameworks/Python.framework/Versions/2.7/lib/python2.7/site-packages/). If you have trouble finding them, search for pyo64.py in Spotlight, or at the terminal type locate pyo64.py
The need to be moved to your Anaconda python packages folder. Most of the time, it will be
~/anaconda2/lib/python2.7/site-packages/. You can navigate to this folder using Finder or from the terminal, e.g., cd ~/anaconda2/lib/python2.7/site-packages/ followed by open . to open the current directory inside finder.
Test pyo
====
- In terminal, enter
python, then:>>>import pyo pyo version 0.8.0 (uses single precision)
If you see this, all is good.
Installing Sublime Text
Sublime Text is a popular text editor with a very large collection of plugins and themes that allow you to make it anything you want it to be. It is not free, but has a generous trial-use policy. If you like it, please purchase a license.
To install Sublime Text, go to the Downloads page, and click on the OS X installer.
To use it efficiently, you'll want to learn some keyboard shortcuts.
There are lots of handy packages for Sublime Text. To install them, you'll want to first install Package Control which allows you to browse and install packages directly from within Sublime Text. Some especially handy ones are Origami, SublimeREPL, AdvancedCSV, and Terminal.
Create a shortcut to Sublime Text
- It's very handy to be able to open a file with sublime text from the terminal. The easiest way to do this is with an
alias.
At the terminal, type locate bin/subl
This will tell you where Sublime Text is installed. Copy the directory path into the clipboard. Then from the terminal: nano ~/.bash_profile . This will open up your bash shell settings file inside a little text-based text editor called nano. Scroll to the bottom and paste in the Sublime Text directory such that the last line looks something like this:
alias s="/Applications/Sublime\ Text.app/Contents/SharedSupport/bin/subl"
Ctrl-X to exit. Save file when it prompts you to and then restart Terminal.
Now you should be able to open any file inside Sublime Text using s, e.g., s my_file.txt
Optional: Creating a virtual environment
====
If you already have a Anaconda environment that you're happy with, and don't want to mess with, or you want to create a separate Python environment for this class, execute the following two lines at the Terminal before following the package installation instructions:
conda create -n psychopy pip
source activate psychopy